Cleaning Thermal Paste: A Comprehensive Guide
Intro
Cleaning thermal paste from computer components is a task that often seems daunting but is essential for maintaining performance and preventing heat buildup. Proper thermal paste application ensures efficient heat transfer from your CPU or GPU to its cooler, thereby allowing your system to run smoothly. Over time, thermal paste can dry out or become contaminated, which hampers its effectiveness and, in turn, affects the overall hardware performance.
This guide will explore the essential steps and considerations necessary for effective cleaning procedures. We will cover various methodologies, the right tools and materials to use, and insights into keeping the thermal conductivity optimal in future installations.
Importance of Cleaning Thermal Paste
Thermal paste serves a critical role in the thermal management of computer systems. When it becomes old, it may lose its viscosity and heat transfer capabilities. As a result, temperatures can rise, which leads to thermal throttling or even hardware malfunctions.
In light of such potential issues, understanding the right methods to clean and replace thermal paste is paramount for anyone who wishes to preserve the longevity and performance of their hardware.
To prepare for this undertaking, having some key tools and resources can enhance the effectiveness of the cleaning process. This article is structured to guide you comprehensively through that preparation.
"Maintaining optimal thermal conductivity is essential for hardware performance, and cleaning thermal paste is a critical aspect of that process."
Necessary Tools and Materials
To successfully clean thermal paste, gather the following:
- Isopropyl Alcohol (90% or higher): This solvent effectively dissolves thermal paste without leaving residue.
- Lint-Free Cloths or Coffee Filters: These materials will prevent scratches on surfaces and avoid leaving fibers behind.
- Plastic Scrapers or Spudgers: These help in gently scraping off the old paste without damaging delicate surfaces.
- Cotton Swabs: Useful for reaching into tight spaces or applying the cleaning solution.
Methodology for Cleaning Thermal Paste
Cleaning thermal paste typically involves several steps. Below is a clear guide to ensure you follow best practices:
- Power Down Your System: Always begin by shutting down your computer and unplugging it from the power source.
- Disassemble the Components: Carefully remove the cooler from the CPU or GPU. Keep track of screws and components for easy reassembly.
- Apply Isopropyl Alcohol: Moisten a lint-free cloth or coffee filter with the isopropyl alcohol.
- Gently Wipe the Surfaces: Use the cloth to wipe away the thermal paste from both the processor and cooler. Change cloths when it becomes excessively dirty.
- Use a Scraper for Residue: If there is stubborn thermal paste remaining, gently use a plastic scraper to remove it.
- Inspect the Surface: Once you believe you have removed all contaminants, double-check for leftover residue.
- Let Components Dry: Allow the cleaned surfaces to air dry completely before applying new thermal paste.
Closure
Understanding the importance of effectively cleaning thermal paste is vital for any technology enthusiast. By following a precise methodology, you not only maintain optimal performance but also extend the life of your systems. As technology evolves, being proactive about maintenance can save both time and money by preventing more serious hardware issues.
While this guide centers on cleaning, remember that the application of new thermal paste is equally important. Future sections of this article will delve into best practices for that aspect as well.
Preface to Thermal Paste
Understanding thermal paste is crucial for tech enthusiasts and gamers alike. It plays a significant role in the efficiency of cooling systems within computers. The thermal paste, sometimes referred to as thermal compound or thermal grease, facilitates the transfer of heat from the CPU or GPU to the heatsink or cooler. This transfer is vital in maintaining optimal performance and preventing overheating issues. Without proper application or maintenance of thermal paste, components may operate at higher temperatures, leading to decreased performance and increased risk of hardware damage.
Purpose of Thermal Paste
The primary function of thermal paste is to bridge the microscopic gaps between the surfaces of two components—such as the CPU and cooler. Metal surfaces are not perfectly flat, and even minor irregularities can trap air pockets. These air pockets act as insulators, hindering thermal conductivity. Thus, thermal paste helps to fill these gaps, improving heat dissipation. When applied correctly, it ensures that the CPU operates within a safe temperature range, maximizing the longevity and efficiency of the hardware.
Common Materials Used
Various materials are utilized for creating thermal pastes, each with its unique properties. Common options include:
- Silicone-Based Pastes: These are widely used due to their ease of application and good thermal conductivity. They are suitable for common computing needs.
- Metal-Based Pastes: These tend to provide superior heat conduction but require careful application to avoid short circuits.
- Ceramic-Based Pastes: Offering a balance of performance and safety, these are non-conductive and suitable for a variety of applications.
Choosing the right thermal paste can impact the thermal performance of your system. It is essential to consider the specific requirements and the workload of your components.
Signs That Thermal Paste Needs Cleaning
Recognizing when thermal paste requires cleaning is crucial for maintaining optimal performance of computer components. Over time, thermal paste can degrade or become ineffective, leading to various problems such as overheating. Understanding these signs not only extends the longevity of the hardware but also ensures that it operates efficiently, reducing chances of hardware failure.
Overheating Components
One of the primary indicators that thermal paste needs cleaning is the overheating of components. When thermal paste dries out or is improperly applied, it becomes less effective at transferring heat from the CPU or GPU to the heat sink. This inefficiency can cause operating temperatures to rise significantly.
If you notice elevated temperatures during normal operation or gaming, check your CPU or GPU with monitoring software. Consistently high temperature readings can be a red flag. Eventually, overheating can lead to throttling, where the system reduces performance to mitigate heat. Thus, timely intervention is necessary.
Decreased Performance
Decreased performance is another telltale sign that thermal paste might require attention. Performance drops can manifest as stuttering in games, longer load times, or system freezes. If your computer previously ran smoothly but now struggles even with standard applications, thermal issues might be at play.
You can evaluate performance issues by monitoring the frame rates and responsiveness during gaming or tasks. If your machine’s performance dips while temperatures spike, it certainly indicates that the thermal paste is not doing its job.
Visible Deterioration
Lastly, visible deterioration of the thermal paste itself often indicates that it needs cleaning. If you visually inspect the CPU or GPU and notice that the thermal paste has become crusty, discolored, or uneven, it’s time to act. Over time, thermal paste can dry out and lose its applied consistency, leading to reduced contact with the surface.
When preparing for a cleaning process, ensure you look closely at the interface between the CPU/GPU and the heat sink. If poor adhesion is evident, then cleaning and reapplication of new thermal paste are necessary to restore effective heat management.
Recognizing these signs can make all the difference in maintaining the health and performance of your technology. Identifying overheating, performance issues, or visible degradation enables technology enthusiasts to take proactive measures.
Preparing for Cleaning
Cleaning thermal paste is a meticulous task and requires the right preparations to avoid damage to your computer components. Taking the time to gather necessary tools and adher to safety precautions is essential to ensure both effectiveness and safety throughout the process. The right measures before cleaning help prevent accidents, reduce risks, and enhance the quality of the cleaning process. When one is well-prepared, the entirety of maintaining hardware performance becomes easier and more efficient.
Gathering Necessary Tools
Isopropyl Alcohol
Isopropyl alcohol is acknowledged as an effective solvent for removing thermal paste. It dissolves the paste without leaving residue behind. The key characteristic of isopropyl alcohol is its ability to evaporate quickly. This makes it ideal for cleaning computer components because it minimizes the risk of moisture lingering on sensitive parts. A unique feature is its high purity levels, often available in 70% or 99% concentrations. While both forms work, the higher concentration is often favored due to faster evaporation. However, care should be taken to ensure proper ventilation and handling, as it is flammable.
Lint-Free Cloths
Lint-free cloths are designed to prevent fibers from adhering to surfaces, which is vital when cleaning delicate components like CPUs or heat sinks. The primary benefit of using lint-free cloths is their softness, which protects surfaces from scratches. This kind of cloth is commonly used in optics and electronics, making it a popular choice in this context. Unique to lint-free cloths is their ability to absorb liquids effectively without leaving traces. One should be aware that using regular cloths can lead to particles sticking to the surface, hindering the cleaning process.
Plastic Scrapers
Plastic scrapers are tools that aid in the physical removal of the old thermal paste. They provide a controlled way to scrape off residual materials without scratching the underlying component. The key characteristic of plastic scrapers lies in their rigidity, offering enough firmness to lift off paste while being soft enough to avoid damage. Utilizing these scrapers has the advantage of providing precision during the cleaning process. However, caution is necessary as too much force can cause scratches if not handled properly.
Thermal Paste Application Tools
Thermal paste application tools can include applicators or syringes specifically designed for the precise application of new thermal paste. These tools contribute by allowing for even and controlled distribution of thermal paste once cleaning is complete. The primary advantageous characteristic of these tools is their design that prevents excess paste. This is critical, as too much paste can lead to less efficient thermal conductivity. However, not all products available are created equally, so selecting a reputable brand is essential for effectiveness.
Safety Precautions
Power Supply Disconnection
Disconnection of the power supply is a fundamental safety measure. It ensures that no electrical current is running through the components being cleaned. This precaution helps to eliminate the risk of electric shock and damage to the hardware. The main feature of disconnecting the power supply is its simplicity; often, it involves just unplugging the unit. However, neglecting this step can result in severe mishaps, making it indispensable.
Static Electricity Mitigation
Static electricity mitigation is crucial when working with sensitive electronic parts. Components like CPUs are very vulnerable to static discharge, which can cause irreversible damage. The main tactic for mitigating static is to utilize anti-static wrist straps or work on anti-static mats. These tools ground yourself, allowing any static charge to dissipate safely. The unique aspect of mitigating these risks lies in being proactive; even simple actions can lead to significant prevention. However, the disadvantage is often overlooked in casual environments, making awareness mandatory.
Step-by-Step Cleaning Process
Cleaning thermal paste is a task that should not be taken lightly. It impacts the overall efficiency and longevity of your computer components. By systematically addressing the cleaning process, one ensures optimal thermal conductivity between the CPU and heat sink. Removing old thermal paste helps prevent overheating, which can lead to performance degradation. Following a structured approach allows for a thorough cleaning while minimizing the risk of damage to delicate parts. Each step is designed to facilitate a successful cleaning experience.
Removing the Heat Sink
The first critical step in this cleaning process is removing the heat sink. This component is vital, as it dissipates heat produced by the CPU. Carefully detach the heat sink to avoid any strain on the CPU. Usually, you'll need to unscrew, unclip, or sometimes twist it slightly to free it. Ensure your workspace is static-free. It's also wise to take a note of how the heat sink is positioned, as this will aid in reinstallation later. Avoid using excessive force; if stuck, gently wiggle it to loosen the bond.
Initial Wipe and Inspection
Once the heat sink is off, the next move is an initial wipe and inspection. Using a lint-free cloth, carefully wipe away visible old thermal paste from both the heat sink and the CPU. This preliminary action removes most of the residue and prepares the surfaces for a more thorough cleaning. While wiping, keep an eye out for any signs of damage or unusual wear on the CPU or the heat sink. Early detection of issues can lead to timely remedies.
Applying Isopropyl Alcohol
To effectively remove the remaining thermal paste, you will apply isopropyl alcohol. A concentration of 90% or higher is recommended as it evaporates quickly and leaves no residue. Dampen a piece of lint-free cloth or a cotton ball with the alcohol. Do not soak it; just a small amount is enough. Gently rub it on the CPU and heat sink surfaces, focusing on areas with leftover paste. The alcohol breaks down the thermal compound without harming the metal surfaces. Allow it to sit for a moment to dissolve the paste completely.
Scraping Residual Paste
After applying isopropyl alcohol, you might still notice remnants of thermal paste. At this stage, using a plastic scraper will come in handy. Carefully scrape off any persistent residue. Make sure the scraper is made from a non-conductive material to prevent accidental damage to the CPU. Be gentle and work systematically. It could be helpful to reapply some alcohol to aid in removing stubborn spots.
Final Cleaning with Lint-Free Cloth
Your last task is to conduct a final cleaning with a lint-free cloth. This step ensures that all alcohol and excess paste are completely removed. Use a clean part of the cloth and wipe down the CPU and heat sink surfaces again. Allow everything to dry for a few moments before proceeding to reapply new thermal paste and reconstructing your setup. Completing this cleaning process meticulously will help maximize the performance of your hardware.
Remember: Proper cleaning is essential for maintaining the performance and lifespan of your computer's critical components.
After Cleaning Procedures
After cleaning thermal paste effectively, one must not overlook the importance of the subsequent procedures. These steps are crucial to maintaining the integrity and performance of your hardware. Rushing through these final stages can lead to ineffective cooling solutions and potential overheating issues in the future. Thus, performing these after cleaning procedures with attention to detail is paramount.
Inspecting the CPU and Heat Sink
The first part of the after cleaning process involves a thorough inspection of both the CPU and the heat sink. Checking for remnants of old thermal paste is essential. Even small residues can create air pockets or hinder proper heat transfer. Look for any marks or visible areas where the paste might still linger.
Additionally, examine the surfaces for scratches or blemishes. Scratches could impede the contact between the CPU and the heat sink, reducing cooling efficiency. Ensure that both components are clean, smooth, and ready to form tight contact with the new thermal paste later on.
In case you find serious damage or excessive wear, it might be worth considering replacement parts to ensure proper functionality. Do not skip this step, as the effectiveness of your cooling system depends on the quality of contact between these two components.
Reapplying New Thermal Paste
Once the CPU and heat sink are clean and free of any residues, it is time to reapply new thermal paste. This step is critical because thermal paste is responsible for conducting heat away from the CPU to the heat sink efficiently. Applying too much or too little can lead to overheating.
- Choose Quality Thermal Paste: While there are many brands available, opt for reputable thermal paste such as Arctic Silver 5 or Noctua NT- to guarantee its thermal conductivity.
- Application Method: A common practice is to apply a small, pea-sized amount at the center of the CPU. Upon placing the heat sink back, it will spread the paste evenly, ensuring optimal coverage.
- Avoid Excess: Using too much paste can lead to spillage over the edges, which might create other problems, including conductivity issues. Just enough to cover the CPU surface is ideal.
- Check Compatibility: Ensure the new thermal paste is compatible with both the CPU and the heat sink material.
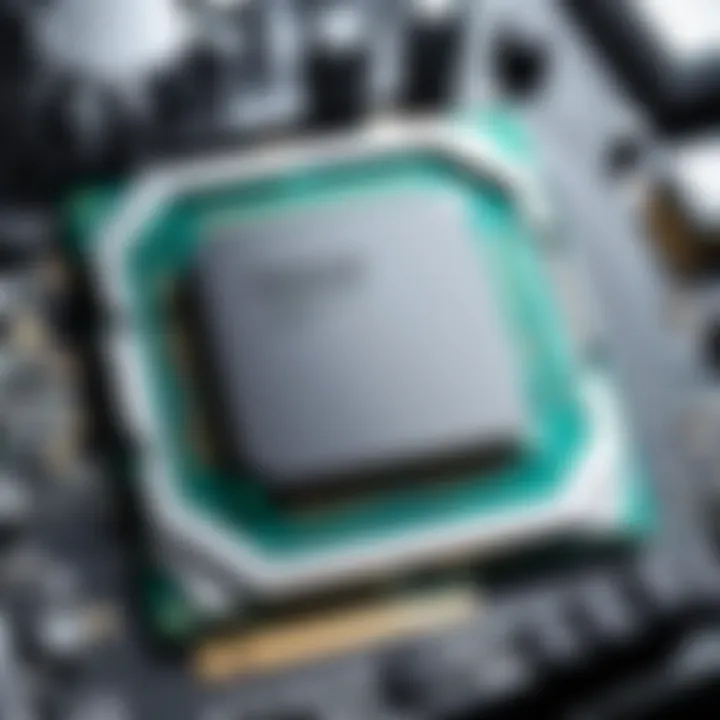
This stage is crucial for maintaining effective thermal management. If applied correctly, it can significantly improve the cooling performance of your system.
Reassemble the Cooling System
Reassembling the cooling system is the final step after a meticulous cleaning. This stage should not be rushed. Make sure all components fit securely and that the CPU cooler is properly mounted back onto the CPU.
- Align Correctly: Position the heat sink accurately. Misalignment can lead to uneven pressure applied on the CPU, which might hinder heat transfer.
- Secure Fasteners: When securing the heat sink, do not overtighten. Each securing mechanism should be firm but can cause damage if forced excessively.
- Reconnect Power Cables: Ensure that fan connectors are plugged back into their respective slots. Missing connections might cause overheating or system failure.
- Check Fan Operation: Once reassembled, it's good practice to check that all cooling fans operate as they should. Watch for any unusual sounds or obstructed motion; these might signal issues needing immediate attention.
Following these steps carefully will yield substantial benefits to the longevity and performance of your hardware. The importance of meticulous practices cannot be overstated in the realm of computer maintenance.
Properly cleaned and maintained thermal paste can significantly extend the life of your components and maintain performance.
By ensuring diligent after cleaning procedures, you can confidently enhance your PC's thermal dynamics, contributing to a better gaming and computing experience.
Tips for Future Maintenance
Maintaining an effective thermal interface is crucial for the longevity and performance of computer components. Regular care can prevent overheating and extend the lifespan of hardware. In this section, we delve into essential tips that are critical for the future maintenance of thermal paste, emphasizing their importance to ensure that your system runs at optimal temperatures.
Routine Monitoring of Temperature
One of the simplest yet most vital tasks is routine monitoring of temperature. System overheating can lead to performance drops or even hardware failures. For enthusiasts, investing in temperature monitoring software can provide real-time readings of CPU and GPU temperatures. Programs like HWMonitor, Core Temp, or Open Hardware Monitor can be helpful. Look out for temperature spikes that exceed recommended limits. Typically, the safe operating range for most CPUs is below 80 degrees Celsius under load.
It is best practice to check temperatures during demanding tasks such as gaming or video rendering. If temperatures begin to rise unexpectedly, it may indicate the need for reapplication of thermal paste or even deeper cleaning. Keeping a close eye on these readings creates an awareness of when further maintenance is required.
Choosing Quality Thermal Paste
When it comes to choosing quality thermal paste, not all products are created equal. The right thermal paste can significantly impact thermal conductivity, which is crucial for cooling efficiency. Look for brands like Arctic Silver, Noctua NT-, or Thermal Grizzly Kryonaut, which are known for their excellent thermal properties. Furthermore, pay attention to the specifications provided by the manufacturers.
Consider the thermal conductivity rating; higher values usually signify better performance. Apart from thermal efficiency, usability also matters. Some pastes are easier to apply and remove than others, offering a smoother experience during maintenance. Investing time and resources in selecting a quality product can yield substantial benefits in system temperature management.
Timely Reapplication Guidelines
Establishing timely reapplication guidelines is essential for maintaining optimal thermal performance. Experts suggest that thermal paste should be reapplied every one to two years, depending on usage and environmental conditions. Systems that operate in dusty environments or undergo heavy usage, such as gaming rigs, may require more frequent attention.
Look for signs indicating it is time for reapplication. If you notice rising temperatures or suspect the thermal paste is dry or crumbly during a cleaning session, act promptly. To ensure effective contact between the CPU and heat sink, ensure the old paste is thoroughly cleaned before applying a fresh layer.
"Regular maintenance is the key to unlocking your system's full potential. Ignoring thermal paste can lead to disastrous consequences."
Incorporating these tips into your maintenance routine becomes crucial for ensuring that your CPU and GPU remain cool. This emphasis on quality and vigilance can sustain hardware performance and reliability, catering to the needs of technology enthusiasts and gamers alike.
Finale
The cleaning and maintenance of thermal paste is not just a routine task; it is a crucial component in ensuring the longevity and performance of computer systems. This article has explored the essential steps and considerations necessary for effective thermal paste cleaning. This process helps to maintain optimal thermal conductivity, reducing the risk of overheating and performance degradation.
Recap of Key Points
- Thermal Paste Importance: It acts as a conductor of heat between the CPU and the heat sink, critical in regulating temperatures.
- Signs of Deterioration: Recognizing indicators such as overheating, decreased performance, and visible wear on thermal paste is vital.
- Preparation is Key: Gathering specific tools like isopropyl alcohol and lint-free cloths ensures an efficient cleaning process.
- Cleaning Process: Following the step-by-step guidelines for removing, cleaning, and reapplying thermal paste is necessary for successful maintenance.
- Future Maintenance Tips: Regularly monitoring your system's temperature, selecting high-quality thermal paste, and adhering to reapplication timelines can prolong the effectiveness and reliability of your hardware.
The Importance of Thermal Paste Maintenance
Regular maintenance of thermal paste is significant for several reasons. First, it prevents overheating, which can lead to hardware failure. Computers are often under heavy loads, especially for gaming or professional tasks, making temperature control imperative. Effective thermal paste cleaning and reapplication enhance system efficiency, thus providing consistently high performance during intensive tasks.
Moreover, neglecting thermal paste maintenance can lead to costly damages. An overheated CPU could lead to a complete system breakdown, resulting in lost data and productivity. Thus, not only is it a matter of performance, but also a matter of investment protection. Maintaining thermal paste contributes to a better overall user experience and ensures that hardware operates as intended, catering to the demands of modern applications.
"Regular maintenance can extend the life of your computer and avoid costly repairs."


